In June 2023, Slitherine Games invited me to Milan, Italy to appear as a guest on their YouTube series The Geek Recipe, a cooking and interview show — it’s a bonkers concept but it works! Slitherine Games was a terrific host for my trip, and I had a great time talking to CMO Marco Minoli about my four-decade-long career in games, all while we were making eggplant parmesan.
Now dinner is served, as the first episode of The Geek Recipe’s second season has premiered on YouTube today. Buon appetito!
In my previous post about using the low-code game development platform YAHAHA Studio to create a navigational puzzle, I discussed how to use the Rotate and Revolve components to create walls that opened and closed like a door with a hinge. In this post, I will describe how to use the Teleporter component and visual effects to make the maze even more magical.
YAHAHA makes getting started with teleporters easy. The platform comes a built-in model called “Gear Teleporter”, which already has Teleporter, Trigger, and Audio Components installed. So, all I need to do is download this bad boy from the Resource Box.
As you may recall, I am building my maze as 16 sections, which, looking down from above, appears as 4 columns x 4 rows. I am calling the columns, left to right, FarLeft, MidLeft, MidRight, and FarRight. The columns are, bottom to top, FarLower, MidLower, MidUpper, andFar Upper.
I am placing this Gear Teleporter in the next section I am constructing, MidUpper-FarRight (MUFR), right behind the Locked Gate I previously added to separate section MLFR from section MUFR. My goal here is to give the players a clue that they need to teleport into section MUFR but they need to find a corresponding teleporter first.
When I first placed the Gear Telporter (which is called “Teleporter_Normal” in the Explorer), I found that it was much too large in comparison to my maze walls. No biggie. I just scaled it down to .3/.3/.3. I then had set its Audio component to play an audio file called “Teleport 1-1”, which I downloaded from the Asset Library, and set the audio to play when the player entered the object’s trigger box.
I always tell my students to test out their games periodically to make sure they work as intendend, and it’s a good thing that I followed my own advice. When I put the Resawner near the teleporter and playtested the game to see if the teleporter sound played when I had my avatar walk on top of it, I discovered that the trigger zone was too low to detect entry. Again, no biggie. I changed the Y value of the trigger box sized from 0.6 to 5.0, tested it again, and everything worked perfectly!
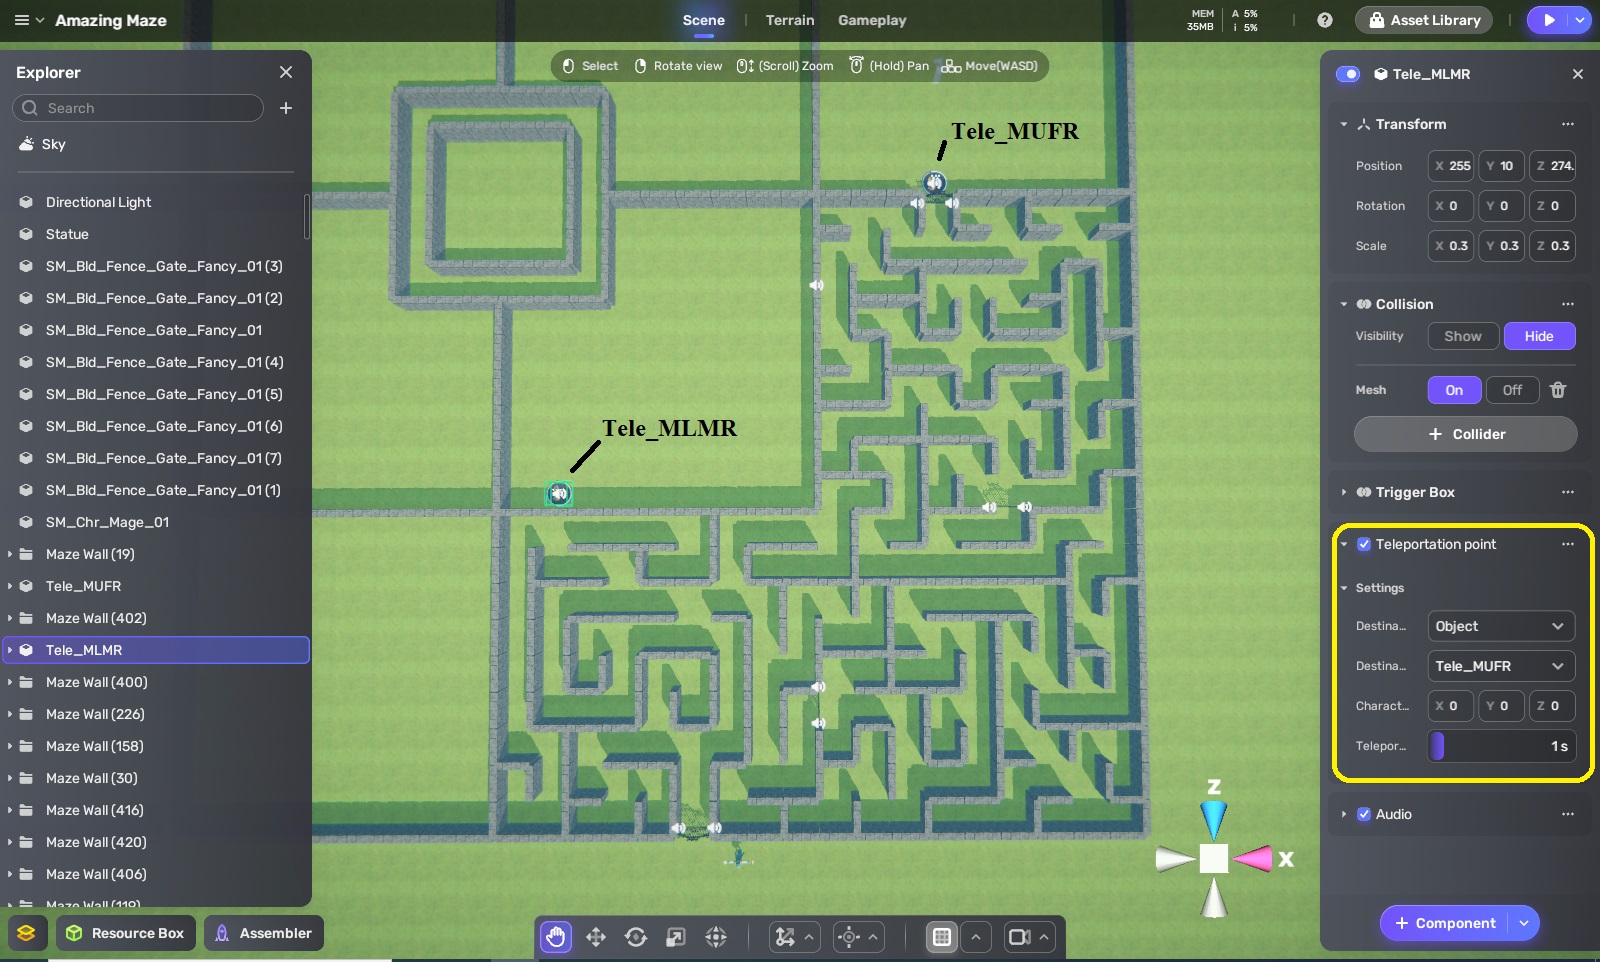
Now that one teleporter is working, time for the corresponding one. I duplicate the teleporter in section MUFR and move the duplicate to the next section I will work on, MLMR. Too more easily tell which is which, I name one “Tele_MUFR” and the other “Tele_MLMR.” Next, I set Tele_MLMR’s Transportation Point component to use Tele_MUFR as its destination.
I immediately test to see if this works, and I find that the teleportation takes too long for my impatient tastes, so I lower the teleport delay from 3 seconds to 1 second.
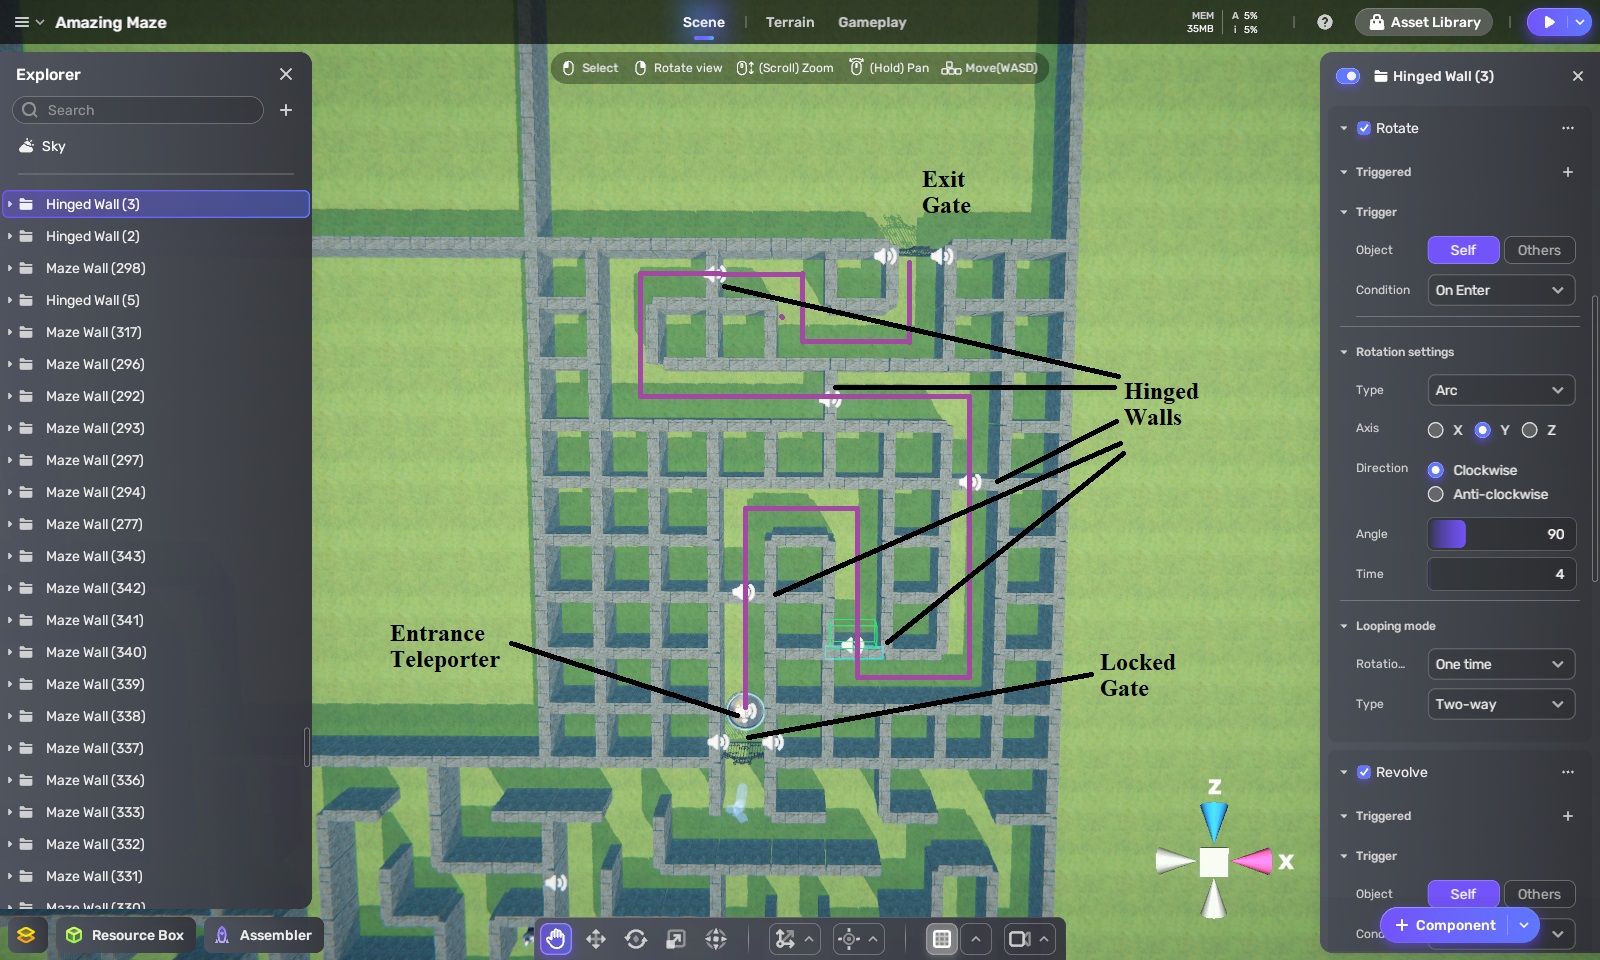
Remember that hinged wall I created when I made section MLFR for my last blog? That’s the real exit for the section, not the locked gate, and I want the player to open the hinged wall and find the path to the teleporter in section MLMR. As always, I follow my mazemaking process of filling in the entire area with horizontal and vertical walls, and then remove the ones necessary to form the path I want from the maze’s entrance (Hinged Wall) to its exit (Tele_MLMR).
The final step in making this maze is to remove some more walls to create passages branching away from the main path. Also, even though I originally created my sections as 9×9 squares, I don’t want them to be too semetric, so I remove some walls around section MLMR’s border so that paths can lead into and out of my initial bounding area. Of course, I still want the sections to be separated so that there are no shortcuts into the solution path, so I also add some walls to preserve a (non-square) boundary between each section.
Oops. Did I use the word “final” too soon yet again? As I checked out my “completed” maze section, I realized that the teleporter needed to be more dramatic — more magical — since that was this secton’s distinctive feature. Fortunately, as I checked the Resource Box, I found a built-in VFX (video effect) that would do nicely, VFX Teleporter_Normal_Keep 2. I scaled it down to .4/.1/.4 and place a copy on each of the two teleporters. Finally, I walked my avatar around the maze to make sure it effect isn’t too obvious from nearby paths.
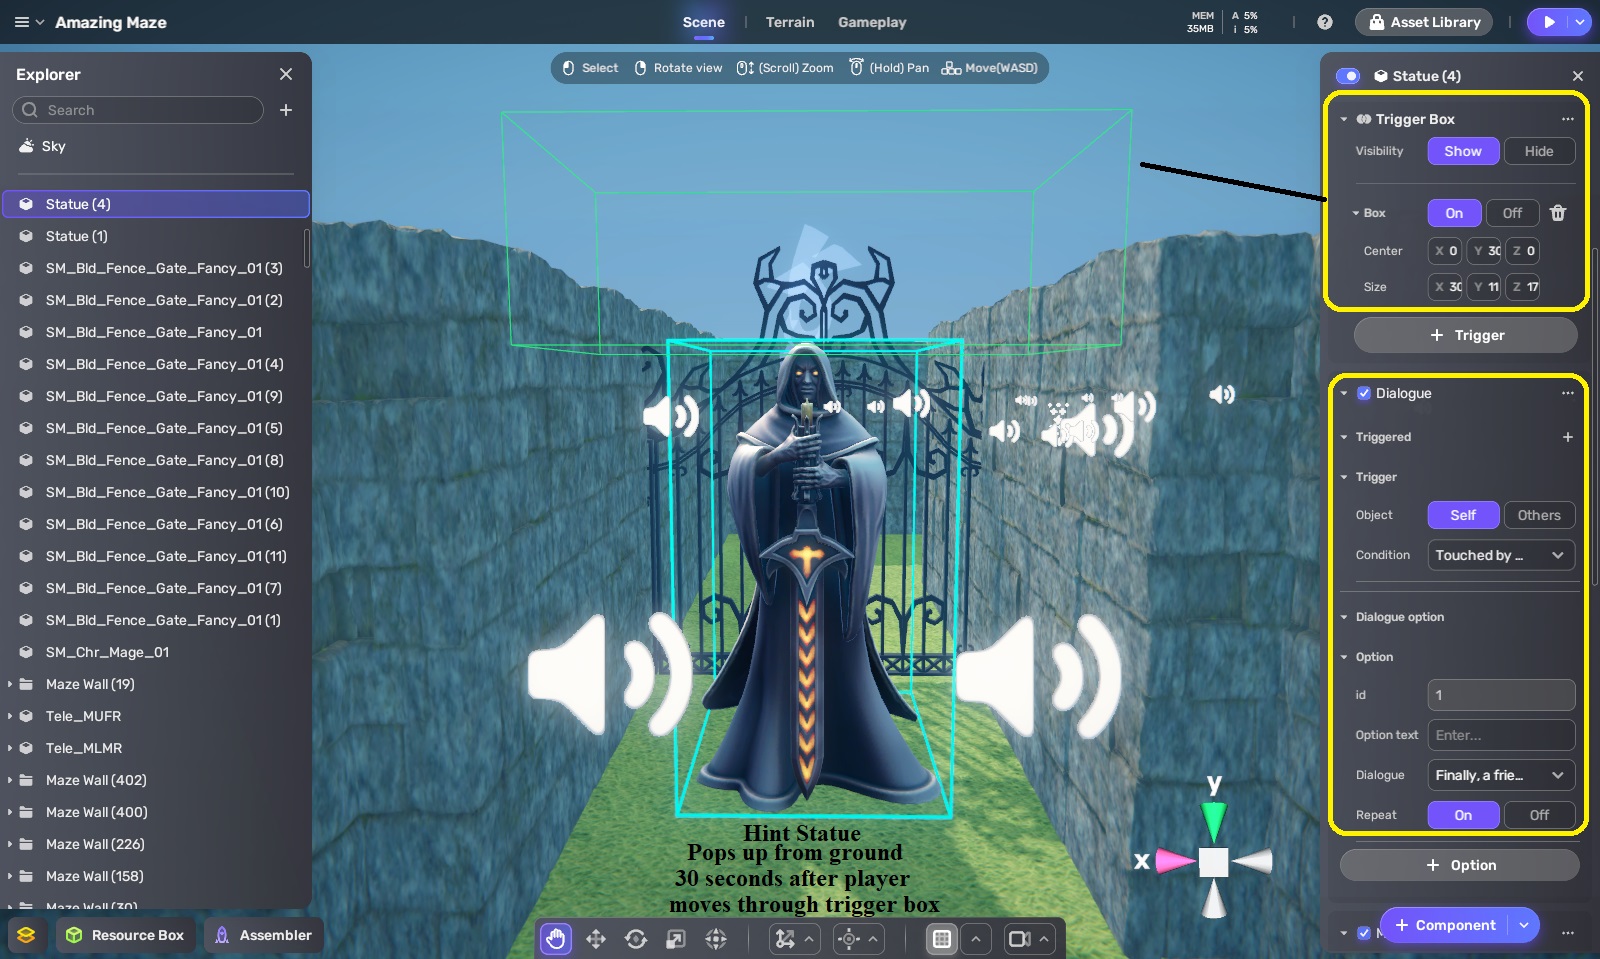
*Head slap* I keep using “final” before I’m finally satisfied that things really are finally final. I’m now concerned that this section is still fairly early in the maze experience, and the player is still learning the rules of how my devious mind works. Since I don’t want some players to get frustrated trying to find a way out and trying in vain to open the hinged wall from this side, I’m going to re-use my “hint statue” from earlier. In fact, I’ll use three of them. One says the dialogue, “Walking alone will not get you through the gate. Find the teleporter. It is some distance from the wall opening.” Another says “You are half the way there.” A third says, “It is near.”
On to Section MUFR, where the other teleporter is located. I place a normal Gate as an exit, but what else to do? I think I’ll have some more fun with hinged walls, since the player has had an experience with one. So, I duplicate the Hinged Wall (1) from the section below and place the copy here.
Here is how I will start off this maze section: the player teleports in from Section FLMR, only to see there’s there’s nothing here but a locked gate and a short passage leading nowhere. However, if the player enters Hinged Wall (2)’s target box, which I put just in front of the wall, the wall revolves and rotates like a door, accompanied a rumble sound, just like the one in the secdtion below. However, this wall opens in a different direction, and so it took about three minutes of experimenting to figure out that rotation needed to be clockwise and the revolve needed to be anti-clockwise around a point where Z=1.
I now create rows and columns of walls and then carve out a solution path to the gate at the exit. However, along the solution, path, I add in a series of hinged walls.
Add in some side passages and allow a couple of the passages from the section below to extend into this one, and I have a maze. Should I add some hint statues, too? No, I don’t think this is necessary. You see, the hinged walls, which open only one way, serve as closure points, making the solution space smaloler and smaller with each wall the player goes through. My feeling right now is that the solution is simple enough to not require any hints.
It’s time for some teleporter fun. I dived Section FUFR into 8 rooms, numbered 1 through 8 (not consecutively, as you can see), and I place a locked gate along the left wall of room 6. I copied the Teleporter object to create 9 Pads, and placed one in each room, with the ninth just outside of the locked gate. In each room I place three portals, using the Blue Circle, Green Circle, and Yellow Circle built-in VFX. I scale each of these portals to 2/2/1 and rotate them on their 9 axis 90 degrees so that they would be upright, like a door rather than a hole. Since they are circles, I give each a spherical trigger box rather than a box-shaped one, and then set up audio component to play teleporter sound effect which triggered.
These color portals are going to work as an order of operations puzzle. The player needs to go through the portals in the correct order to exit out through Pad(9). I used the above chart to work out this puzzle. The correct path is Blue-Green-Yellow-Blue. If players choose any of the wrong portals (Green or Yellow) in Room 1, they will bounce around between Rooms 2, 3, 4, and 5 until they eventually wind up in Room 1 again, where they can start over.
If players make choose the wrong portals in Rooms 6, 7, or 8, they will be sent into Rooms 1, 2, 3, 4, or 5. So, there is only one sequence of portals leading to Pad(9), and any other sequence eventually leads back to Pad(1). After I was convinced that this plan worked as I wanted, I set the Teleportation Point of each color portal to go to the appropriate pad.
Since maze sections are 9 x 9, divding FUFR into 8 sections resulted in rooms that weren’t all the same dimensions. That’s okay. I don’t want these sections to necessarily be symmertical. I just move some walls and add some others so that the each room looks a bit different from each other. I also rearrange the color order of the portals or move the location of the pad in most of the rooms.
I also set each of the teleporters’ Y rotation position so that players would be facing direction I wanted when they teleport into the room. For example, when telporting into room 6, I want players to be facing the locked gate so that they see the exit pad (Pad(9)) on other side.
This maze definitely needs hints and therefore, a hint statue. Need hints. This time I placed it under the terrain between the gate and Pad(1); however, I put a trigger box over its head so that the trigger extended above the ground while the statue was underneath. When the player walks through the trigger box, the statue will pop up about 30 seconds later, so that if players wind up back in room 1 again, the statue will tell them what order of color portals to go through to reach the exit of this section of the maze.
For Section MUMR, I am going to combine portals with hinged walls. Well, it’s mostly going to be portals because this section will be like an endless runner. When players teleport onto Pad(9), they will find themselves in a long, straight passage with a yellow portal at the end. When they go through that portal, they find themselves at the end of another long corridor that has a yellow portal at the end. After going through several of these, they be in a corridor that leads to a locked gate. That gate looks onto Section MUML, which is the final section of the game. Eventually, there will be a fierce Minotaur there, guarding the maze’s exit!
But let’s not get ahead of ourselves. Let’s get back to the yellow portals of Section MUMR. Instead of the portal teleporting them to a pad object this time, I’m having it teleport to a specific position in another corridor. How do I figure out the custom coordinates to use for the position? I’ll use a pad object, but I will move it to where I want the player to appear, write down the pad’s coordinates, put them into the corresponding portal’s teleportation point, and then move the pad to figure out the teleport point for the next portal. I do this for all 8 yellow portals and then delete the pad object, as its work is done.
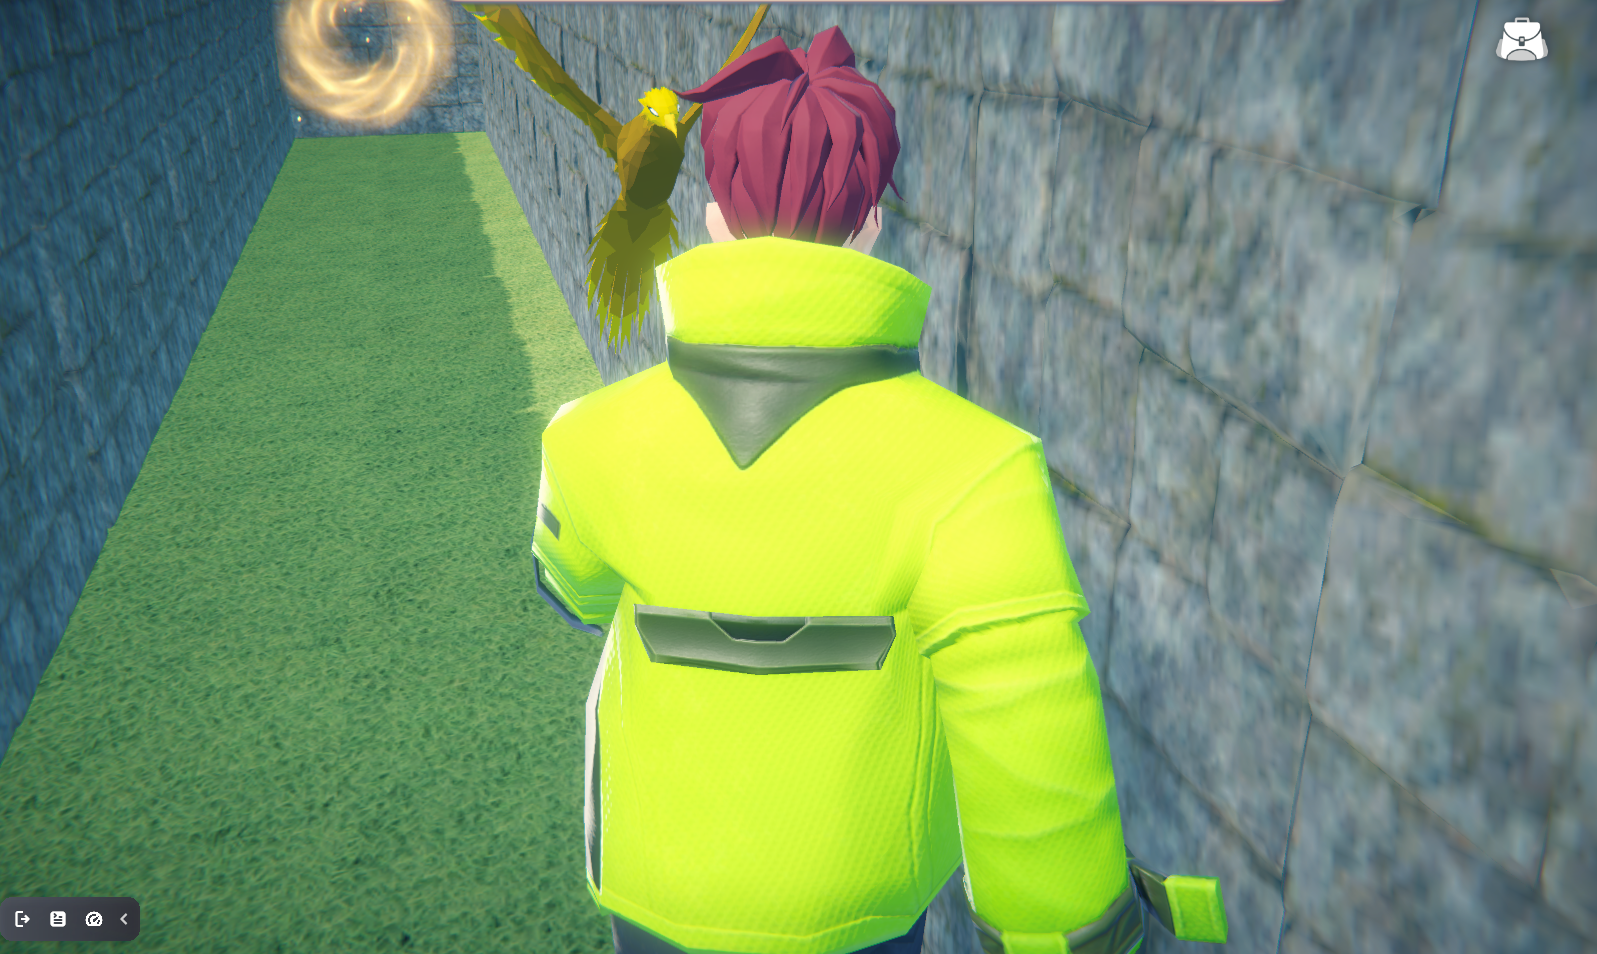
After playtesting this endless runner section, I realized it needed more and decided that some of the yellow portals should have yellow Phoenix’s flying out of them as an obstacle for the player. I download an animated yellow Phoenix model from the Asset Library and placed it under the terrain in front of the yellow portal in Corridor 3. I then put a large trigger box attached to the wall behind the portal that ran from the wall to most of the length of the corridor. When the player enters the trigger box, a bird sound effect will play and then the Phoenix will move through four waypoints. It will first pop up 5 units from under the terrain so that it appears in front of the portal. It will then fly 10 units down the corridor towards the player. If it hits the player, it will push the player back. The Phoenix then drops back down 5 units so that it disappears under the terrain again and then moves back 10 units to its origin point. This will happen every time the player enters the trigger box from the end of the corridor opposite the player.
I do the same for Corridors 5 and 7, but with each one, the trigger box is a little shorter, and the Phoenix appears in a slightly different position in front of the portal and then flies toward the player a little faster. For Corridor 8, I have two Phoenixes come out of the portal. After playtesting it, I find that it makes this section of the maze much more interesting while not being punishingly difficult — this is more of a puzzle game, after all, and not an action game.
I have one more trick up my sleeve for when the player finally reaches the corridor leading to the locked gate looking into Section FUML with the Minotaur. I set up a trigger box so that when the player comes to the gate, a hinged wall behind him opens and closes. When players turn around, they may miss seeing the wall closing, but they will see a green portal at the end of the other end of the corridor. If they decide to go through that portal, they will go into another endless runner sequence involving two long corridors with a green portal at the end of each. Unfortunately for the player, that last green portal leads right back to Pad (9), and they’ll have to do this section of the maze over again.
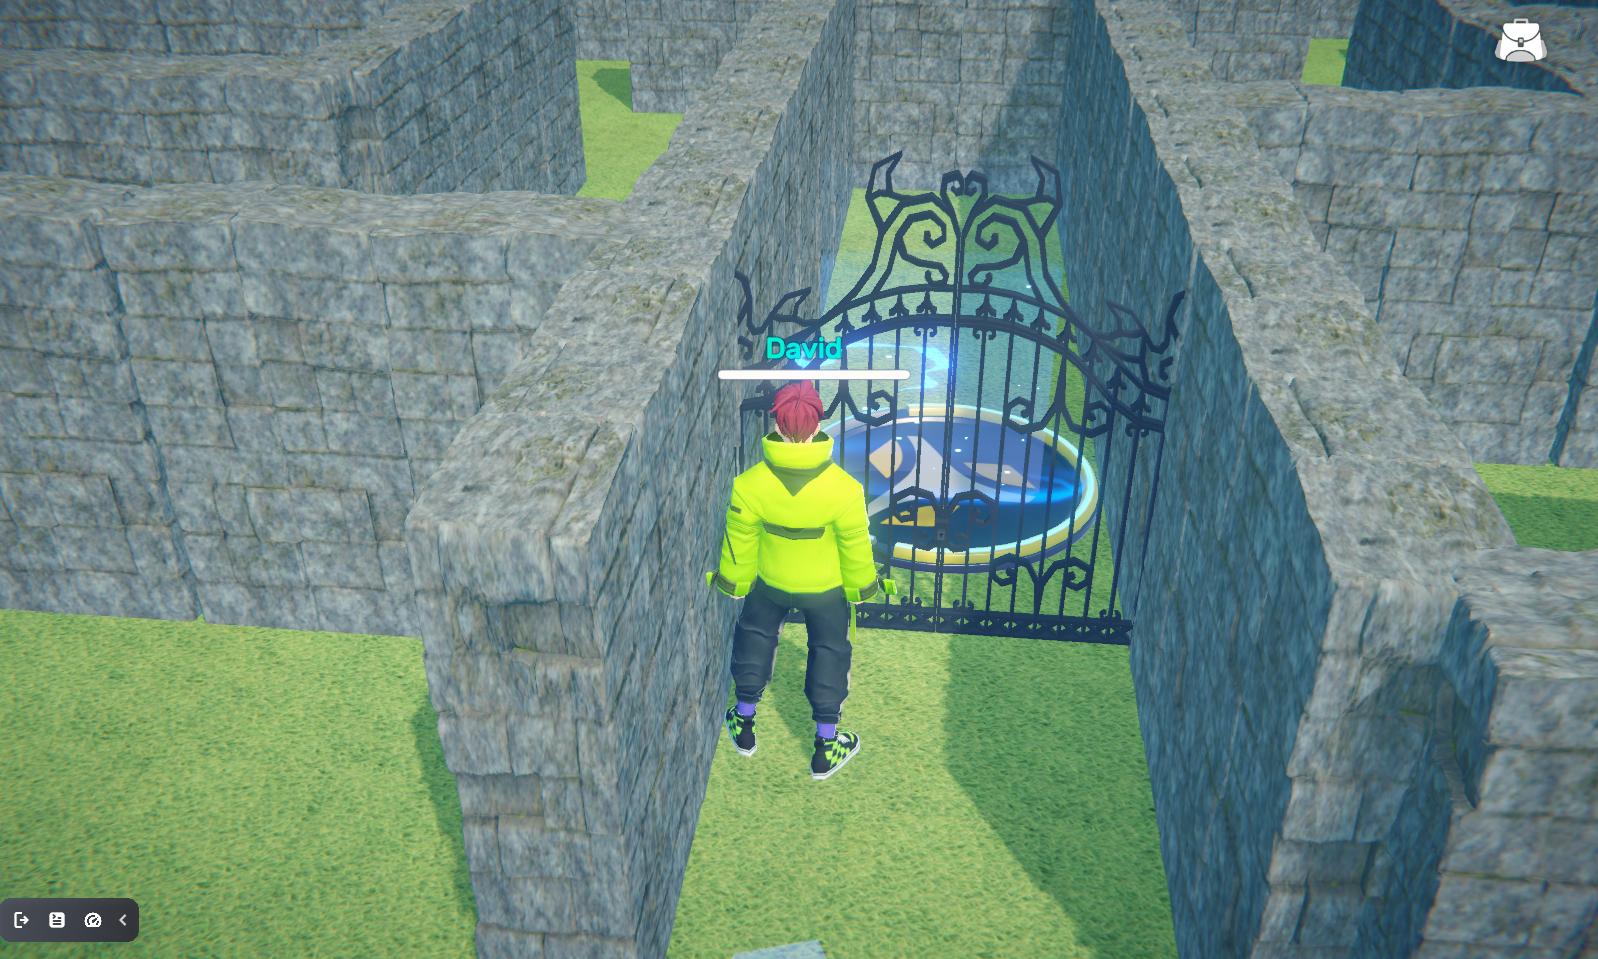
However, if they do notice the hinged wall and pass through before it closes, they will enter a long corridor with another hinged wall at the end. This leads us into Section MUMR containing… what I will dicuss in my next YAHAHA and the Amazing Maze entry. This time we covered a lot of territory — teleporters, video effects, and movement waypoints — but there’s more coming in my next post. In the meantime, here are some screenshots of what these latest features look like while playing The Amazing Maze.
Note that you already have learned more than enough to start making your own 3D games using YAHAHA Studio. In fact, you may even be ready to participate in the YAHAHA Global Game Jam taking place January 30th through February 5th, with a $15,000 prize pool. You can find out more by click on this link.